Dejavoo Command and Communication Center
Overview
Feature Compatibility
Minimum Required POS Build: 10145
Supported Terminals: Dejavoo P8, P12, P17, P18, P1& P3 (With Android 11)
How It Works
Enable Control Center and set up the Terminal
Log in to ipospays.com.
Go to S.T.E.A.M → Edit Parameters.
Use the search box to find and select the target POS TPN → Edit Parameter.
Go to Value Add → Control Center.
Click Save for the changes to take effect.
Ensure the TPN has a build number of 10145 or higher.
Enter the TPN on the merchant’s payment terminal and perform a Parameter Update.
A message will appear on the status bar:
“NATS JetStream Listening for JetStream messages…”
This confirms the device is ready to receive remote commands and messages.
Access From the Portal
Log in to ipospays.com.
Select Control Center from the side menu
Use the search box to find terminals by:
a. TPN/Device Label
b. Merchant DBA
Select one or multiple TPNs.
Under the Command and Communication Center, choose an action.
Available Actions
A. Commands
Choose a command from the drop-down menu:
| Command | Description |
|---|---|
| APP UPDATE | Remotely update the DvPayLite app |
| PARAM UPDATE | Perform a remote parameter update on the terminal |
| REBOOT | Restart the merchant’s terminal remotely |
| GET TIME | Retrieve the current time set on the terminal |
| SET TIME | Set the time on the terminal remotely |
APP UPDATE:
Choose the APP UPDATE command.
Enter a Job Name (helps track the command later in the Device Alerts section).
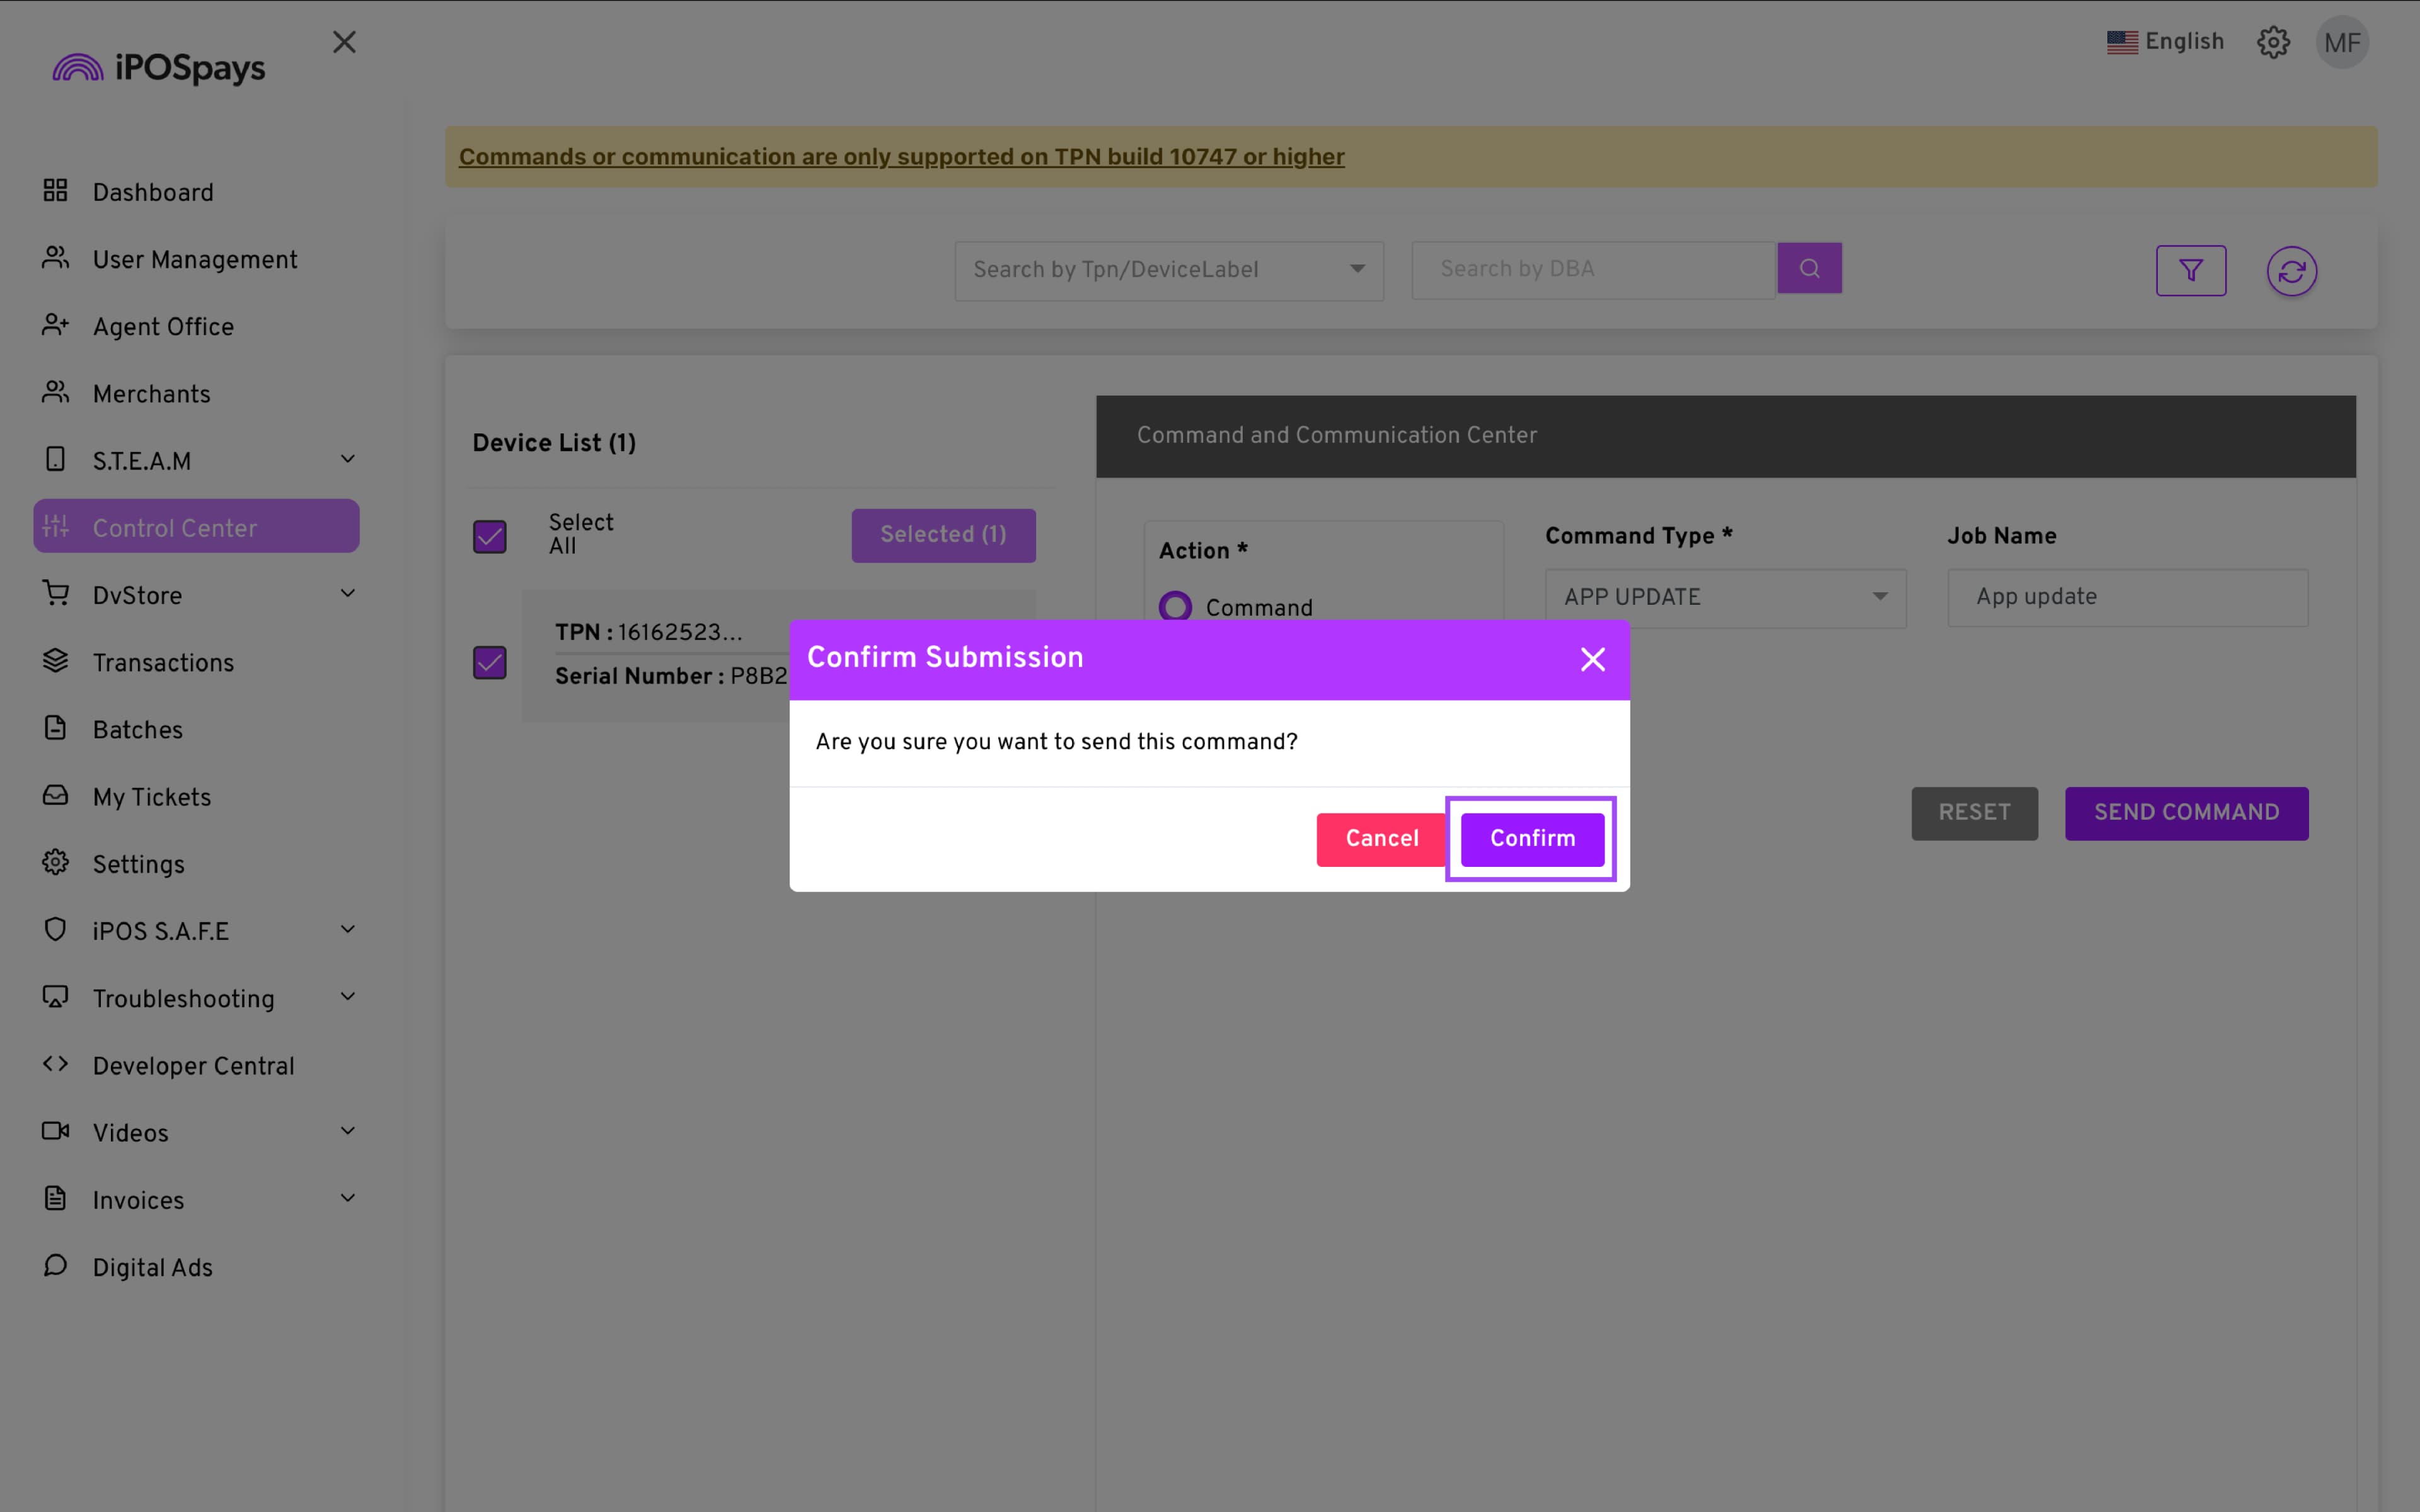
Click SEND COMMAND.
Click Confirm when the Confirm Submission prompt appears.
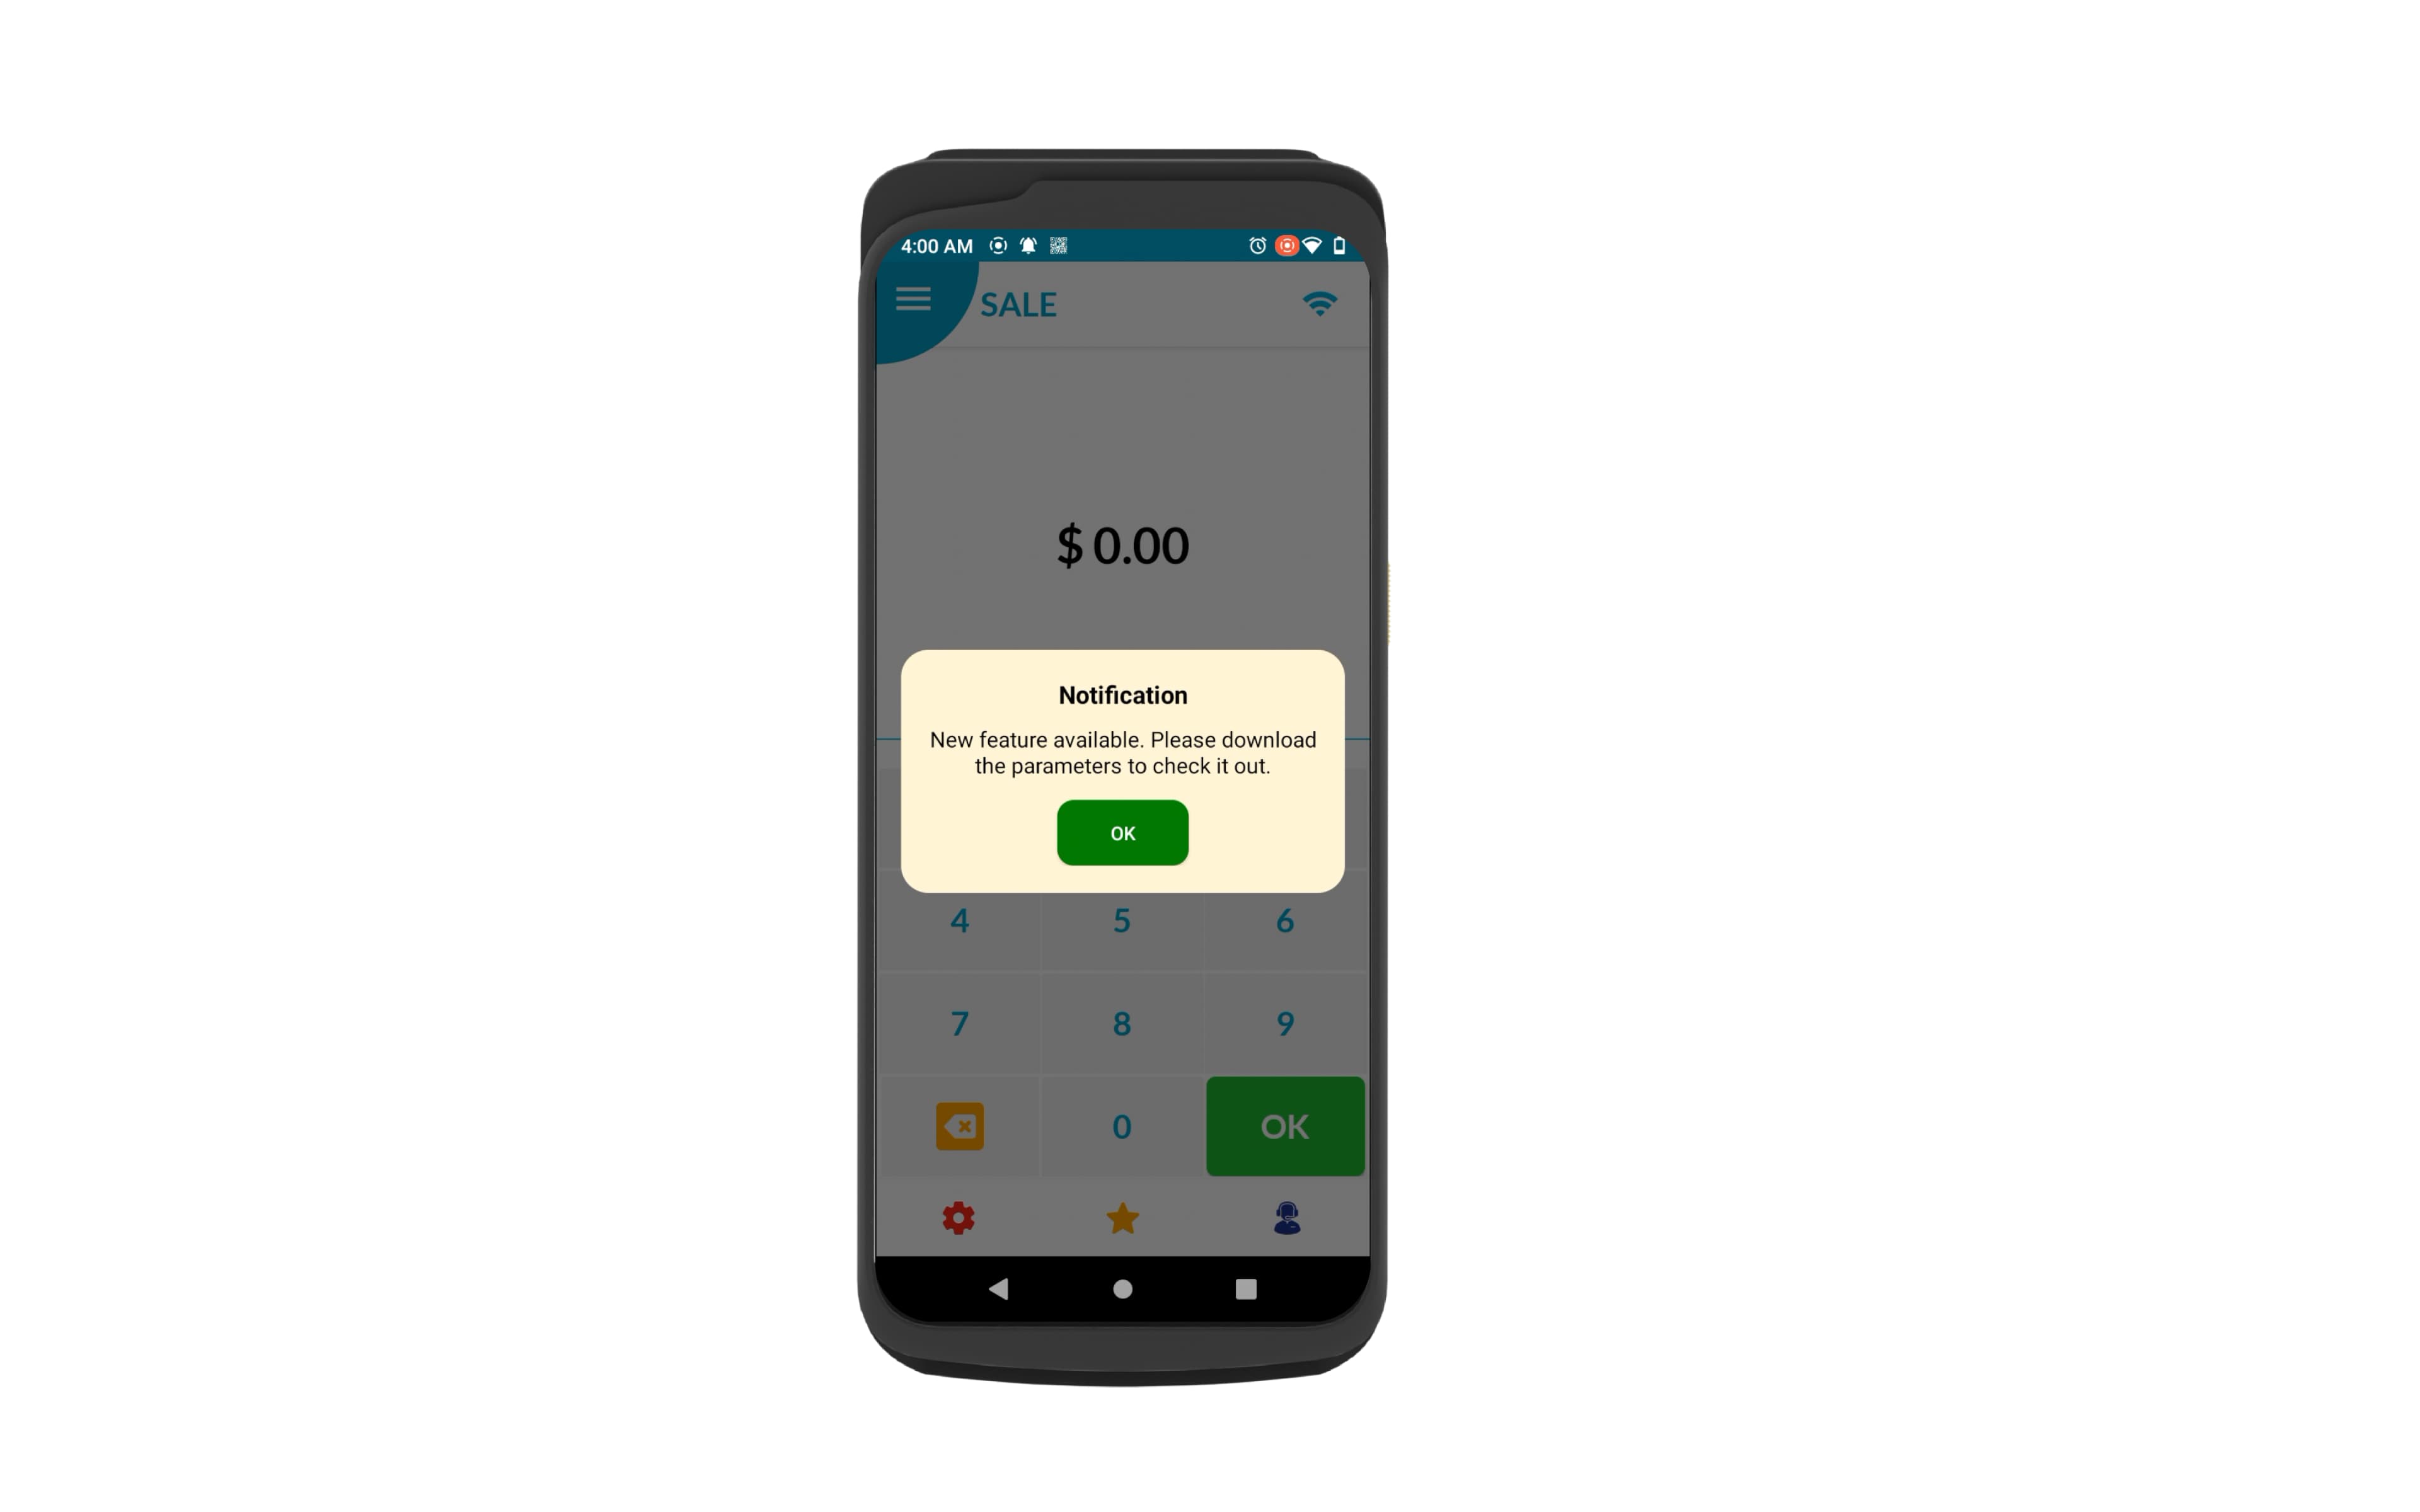
- A banner will be displayed on the terminal before the command is executed.
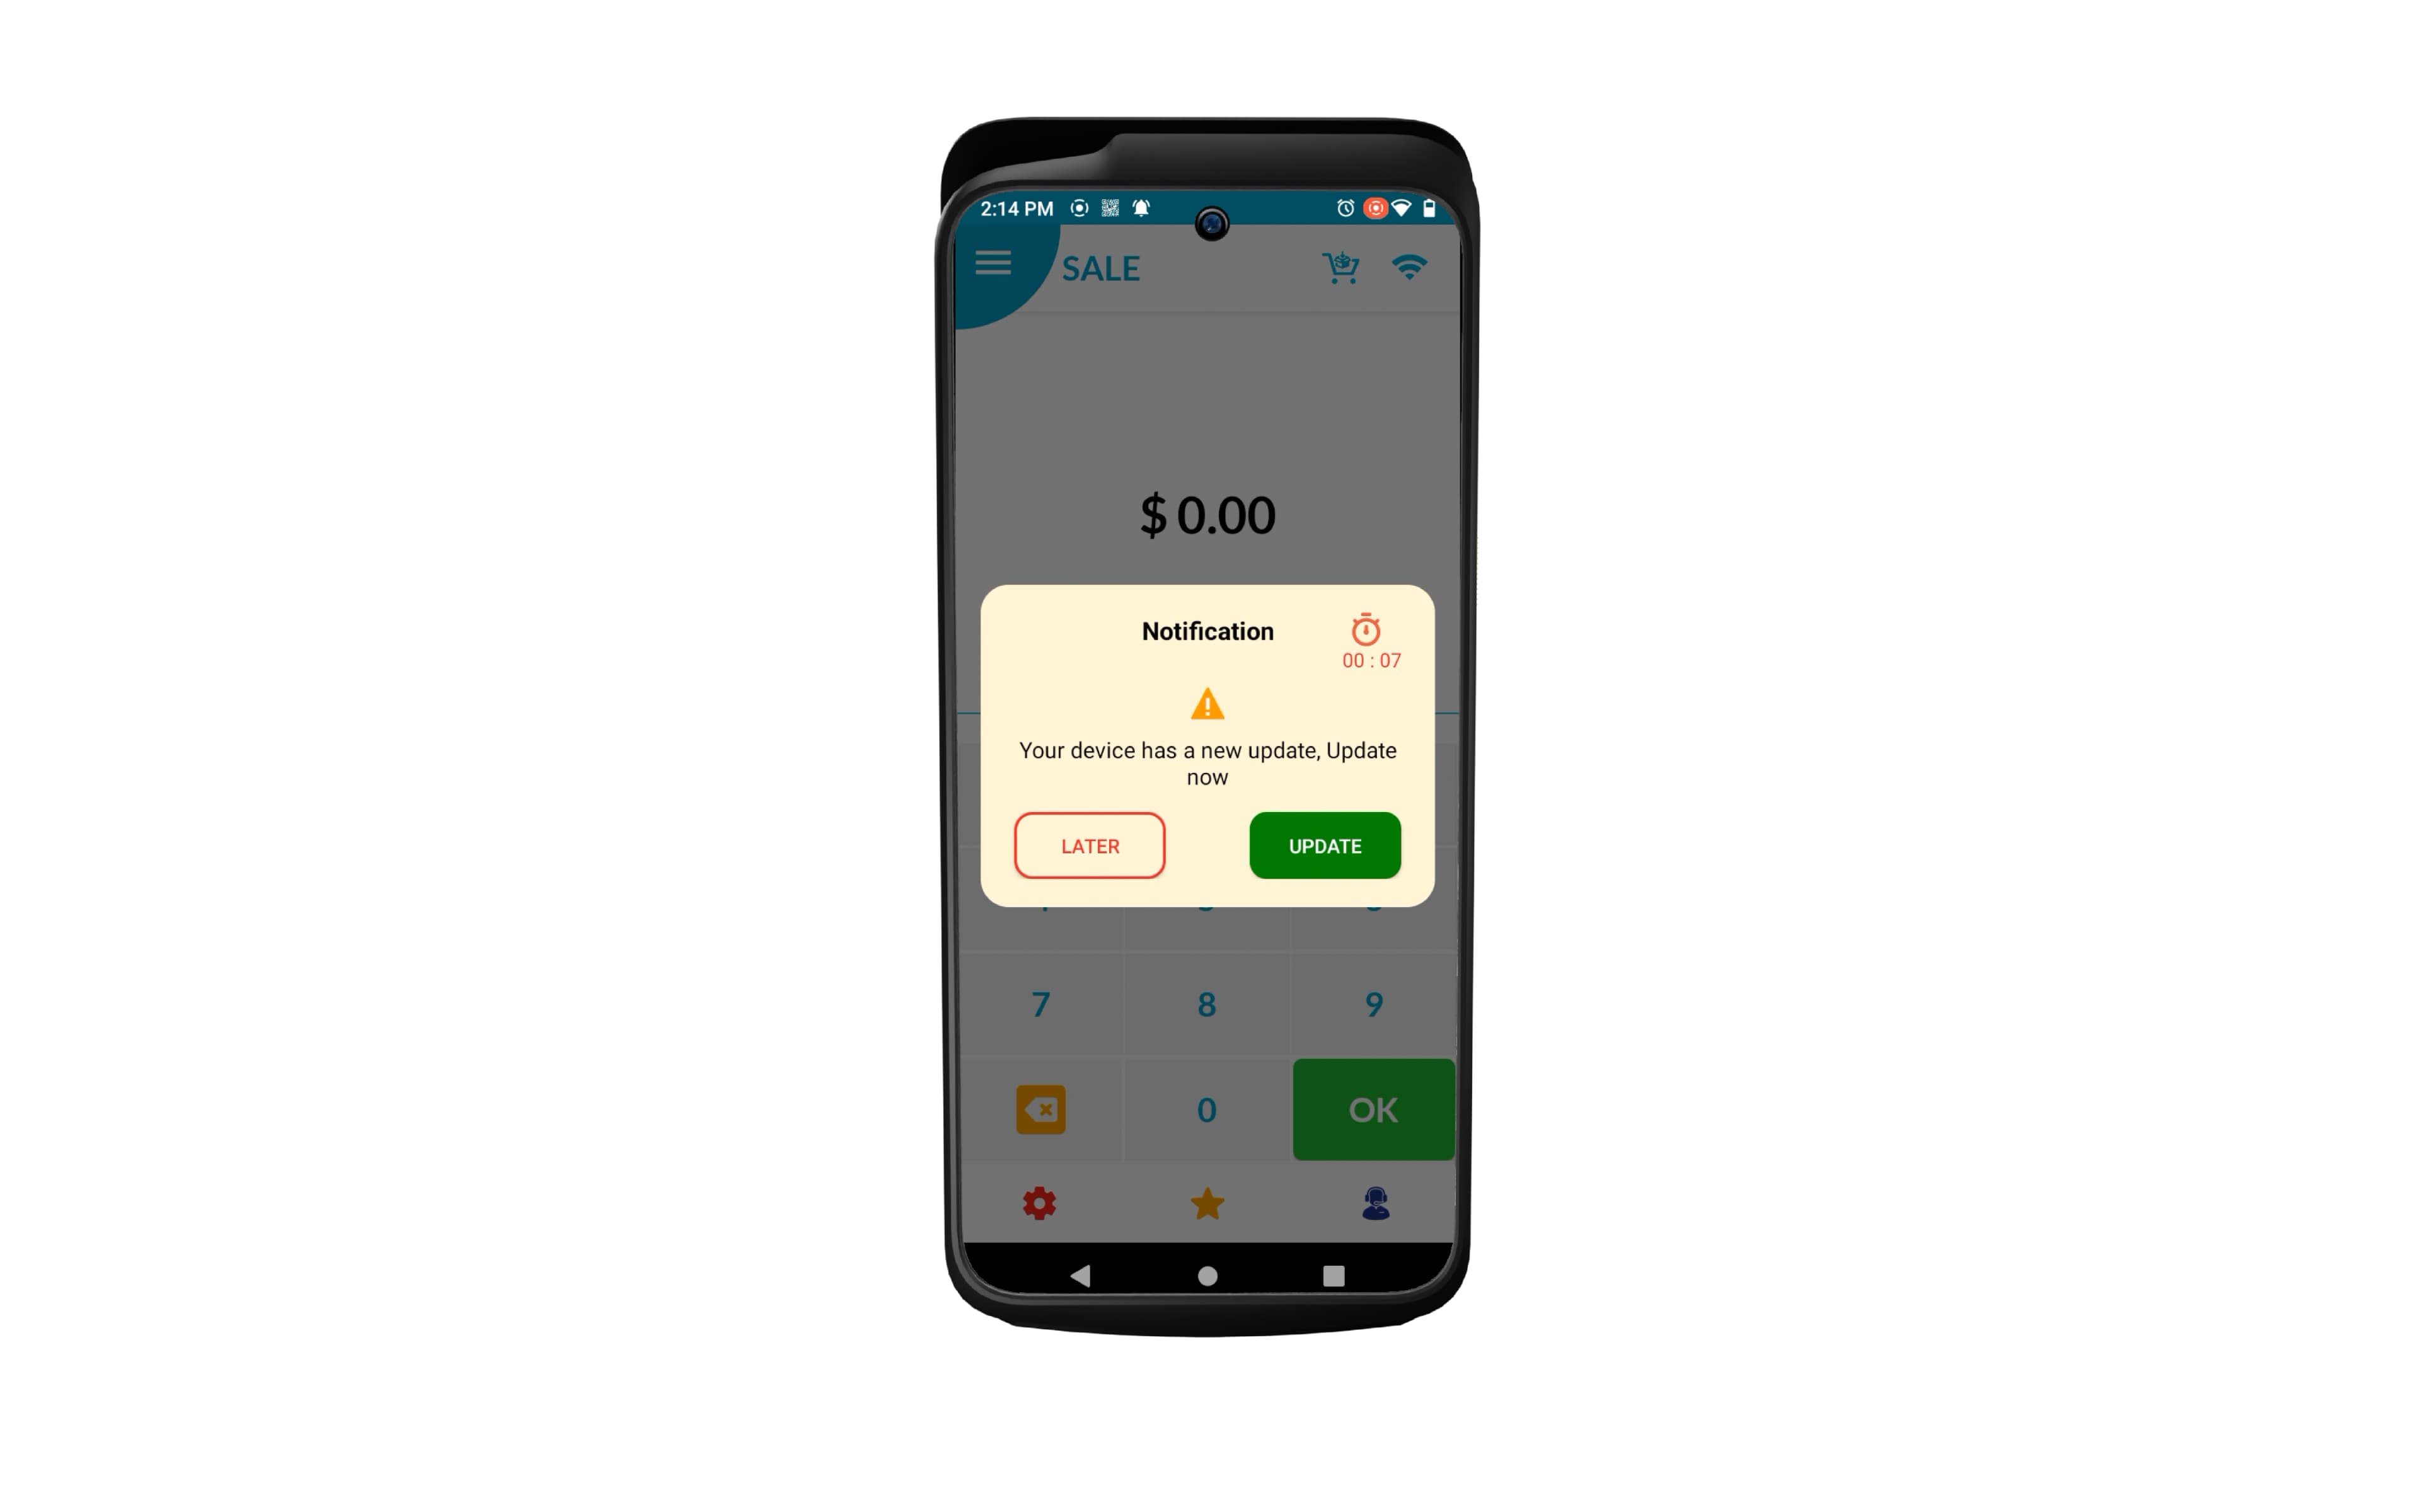
If you leave the banner untouched, the terminal will automatically execute the command once the timer runs. You can also tap UPDATE to immediately execute the command or click LATER to ignore it.
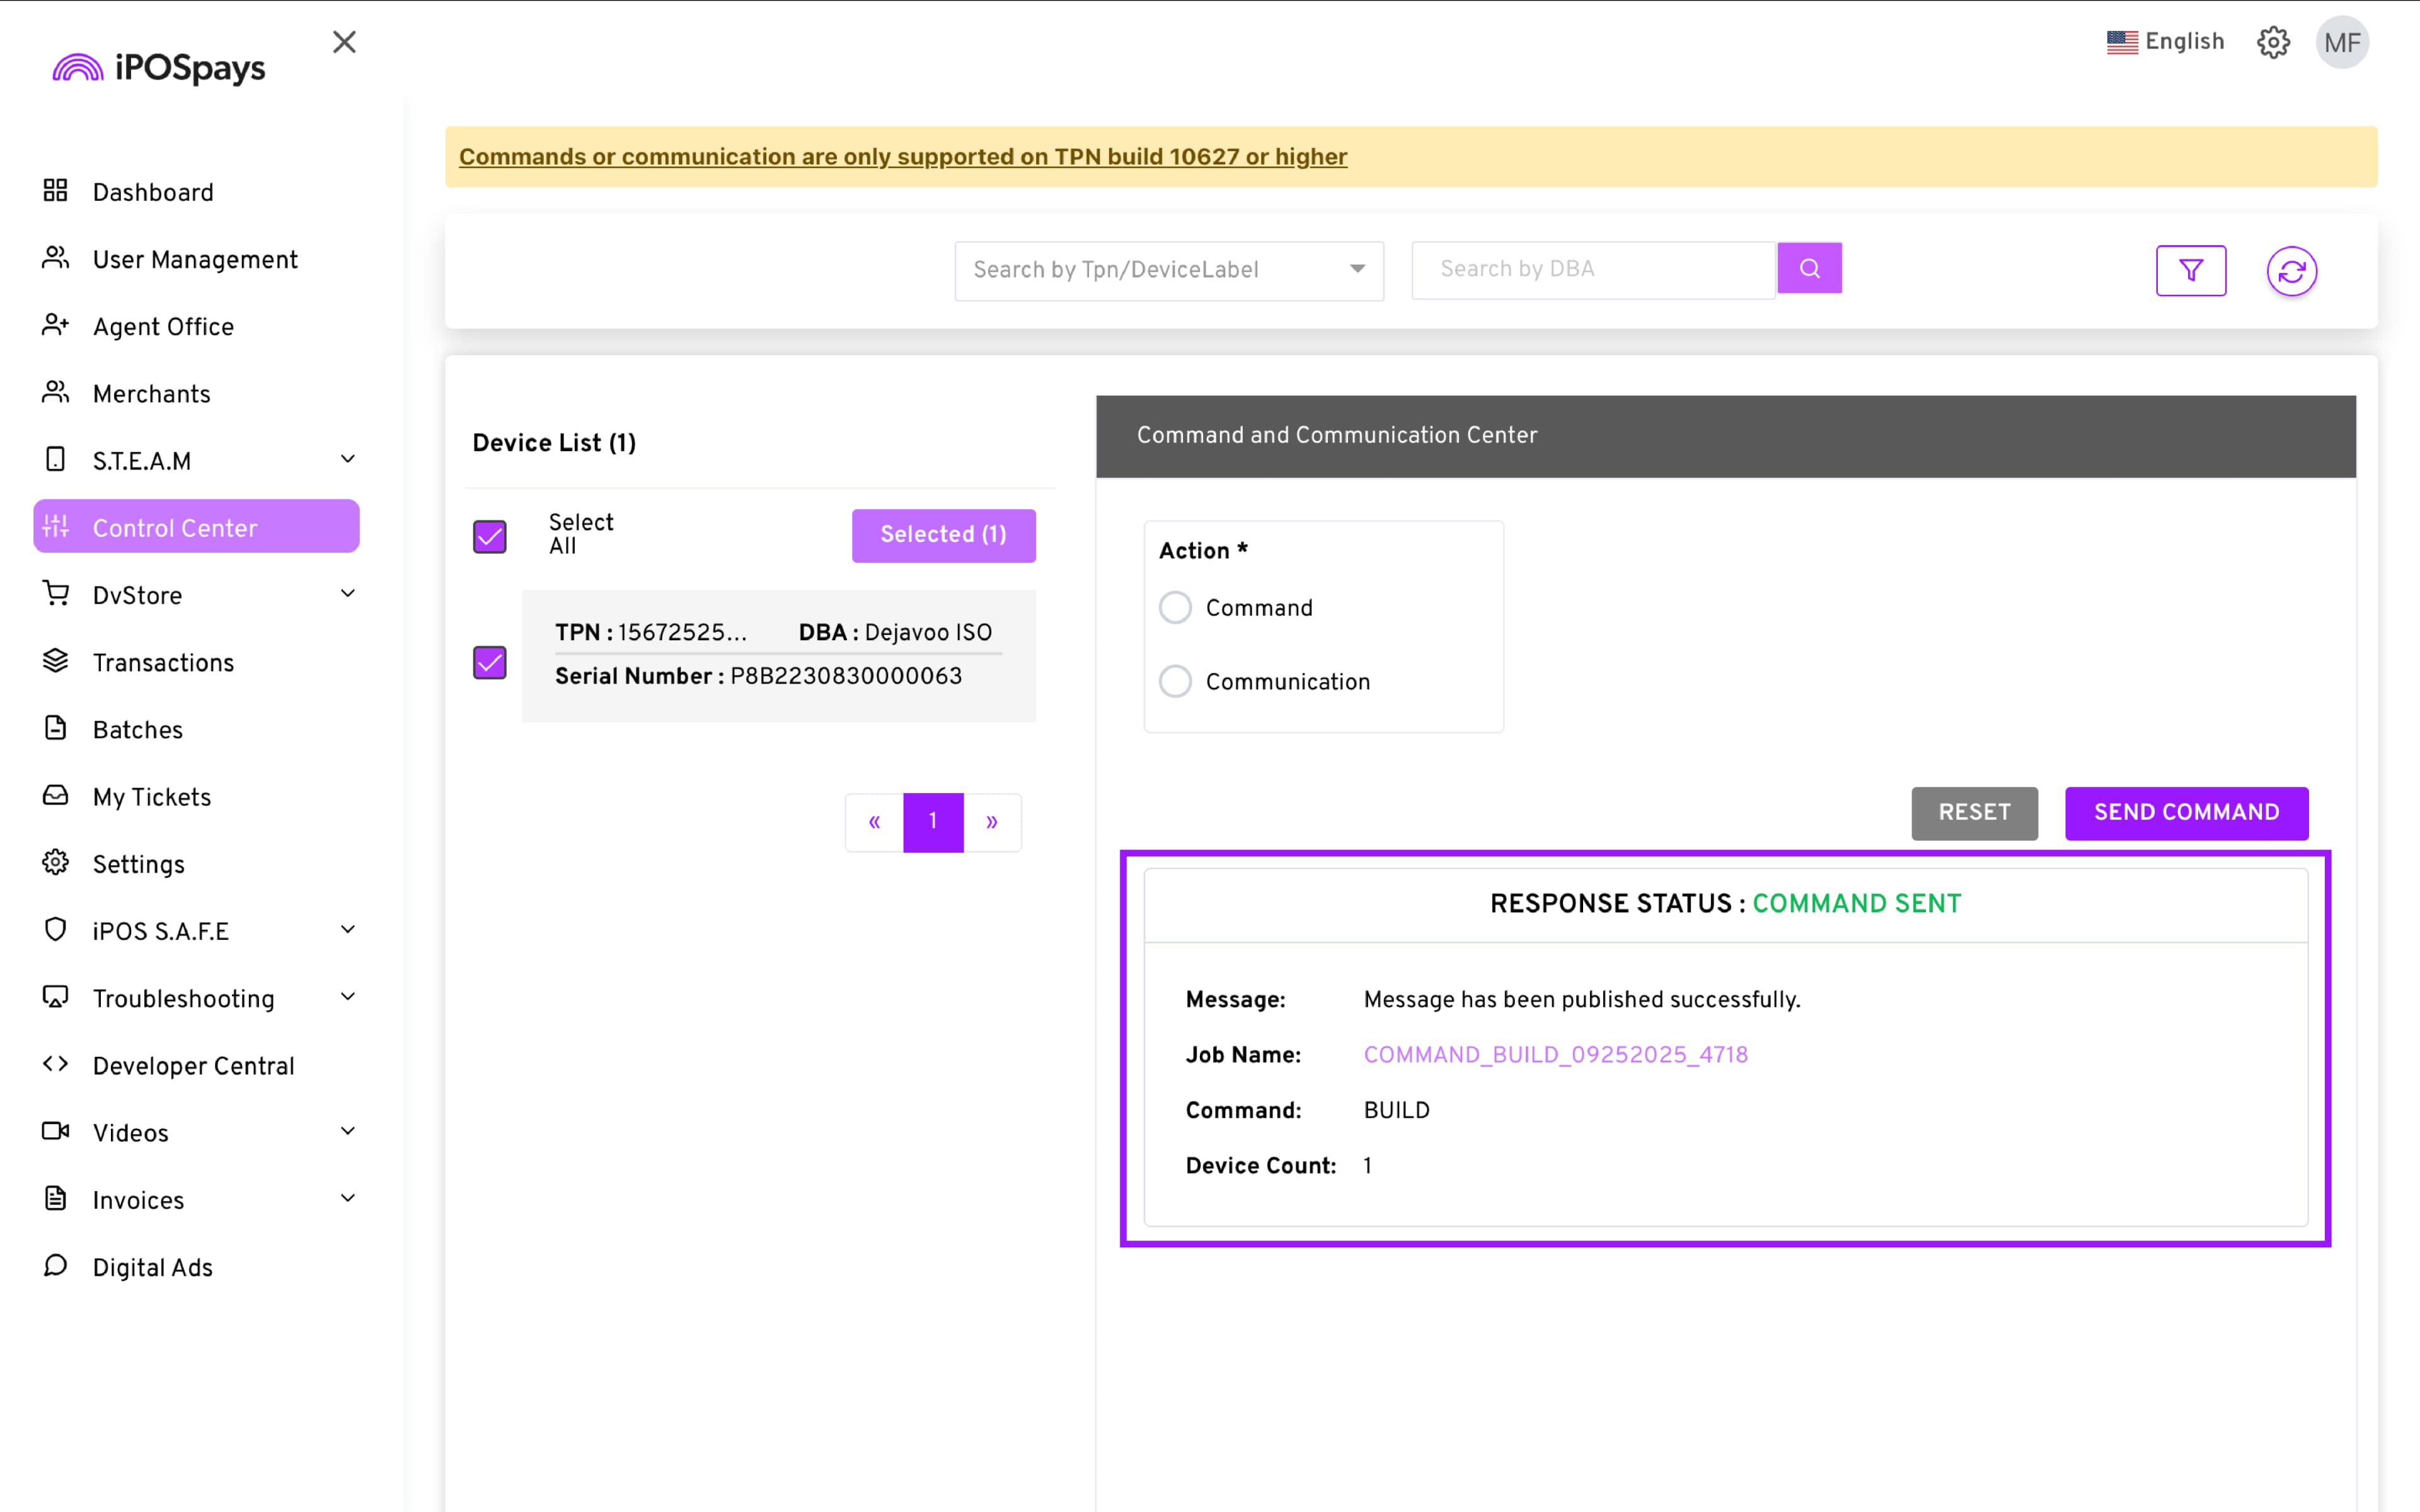
The result will be displayed on the screen along with the details of the command.
PARAM UPDATE:
Choose the PARAM UPDATE command.
Enter a Job Name (helps track the command later in the Device Alerts section).
Click SEND COMMAND.
Click Confirm when the Confirm Submission prompt appears.
A banner will be displayed on the terminal before the command is executed.
If you leave the banner untouched, the terminal will automatically execute the command once the timer runs. You can also tap UPDATE to immediately execute the command or click LATER to ignore it.
The result will be displayed on the screen along with the details of the command.

REBOOT:
Choose the REBOOT command.
Enter a Job Name (helps track the command later in the Device Alerts section).
Click SEND COMMAND.
Click Confirm when the Confirm Submission prompt appears.
A banner will be displayed on the terminal before the command is executed.
If you leave the banner untouched, the terminal will automatically execute the command once the timer runs. You can also tap UPDATE to immediately execute the command or click LATER to ignore it.
The result will be displayed on the screen along with the details of the command.

GET TIME:
Choose the GET TIME command.
Enter a Job Name (helps track the command later in the Device Alerts section).
Click SEND COMMAND.
Click Confirm when the Confirm Submission prompt appears.
A banner will be displayed on the terminal before the command is executed.
If you leave the banner untouched, the terminal will automatically execute the command once the timer runs. You can also tap UPDATE to immediately execute the command or click LATER to ignore it.
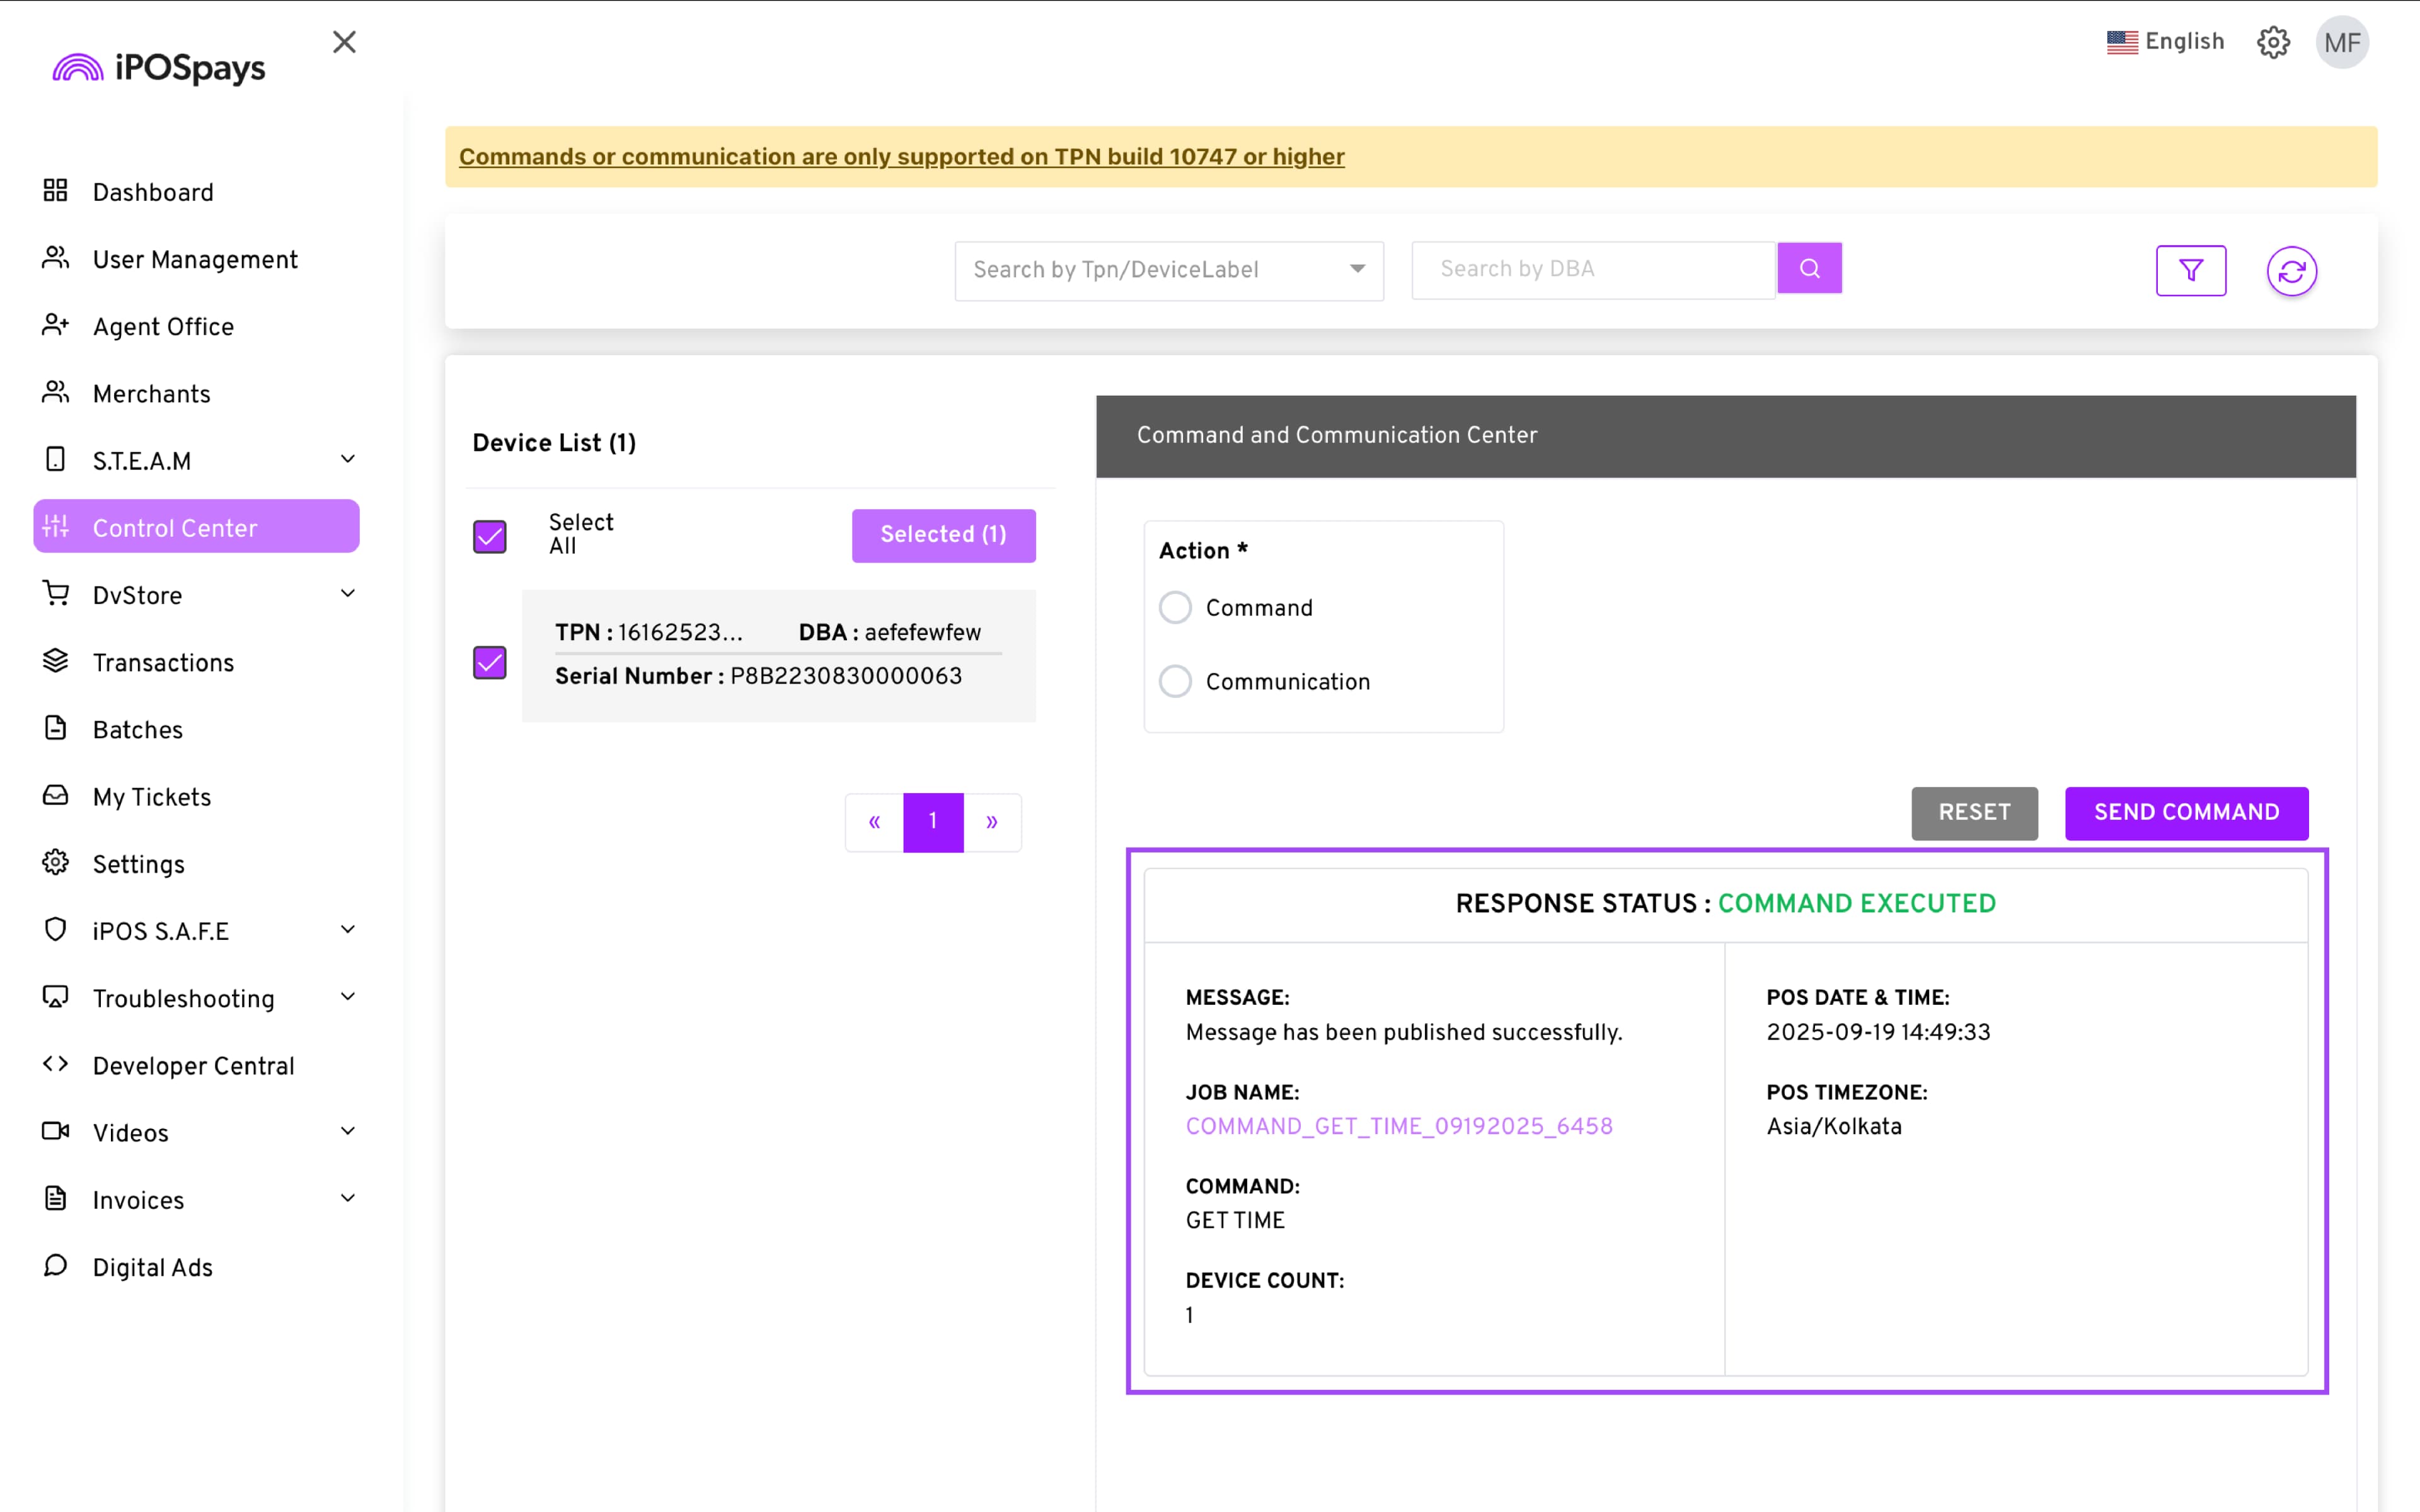
The result will be displayed on the screen along with the details of the command.
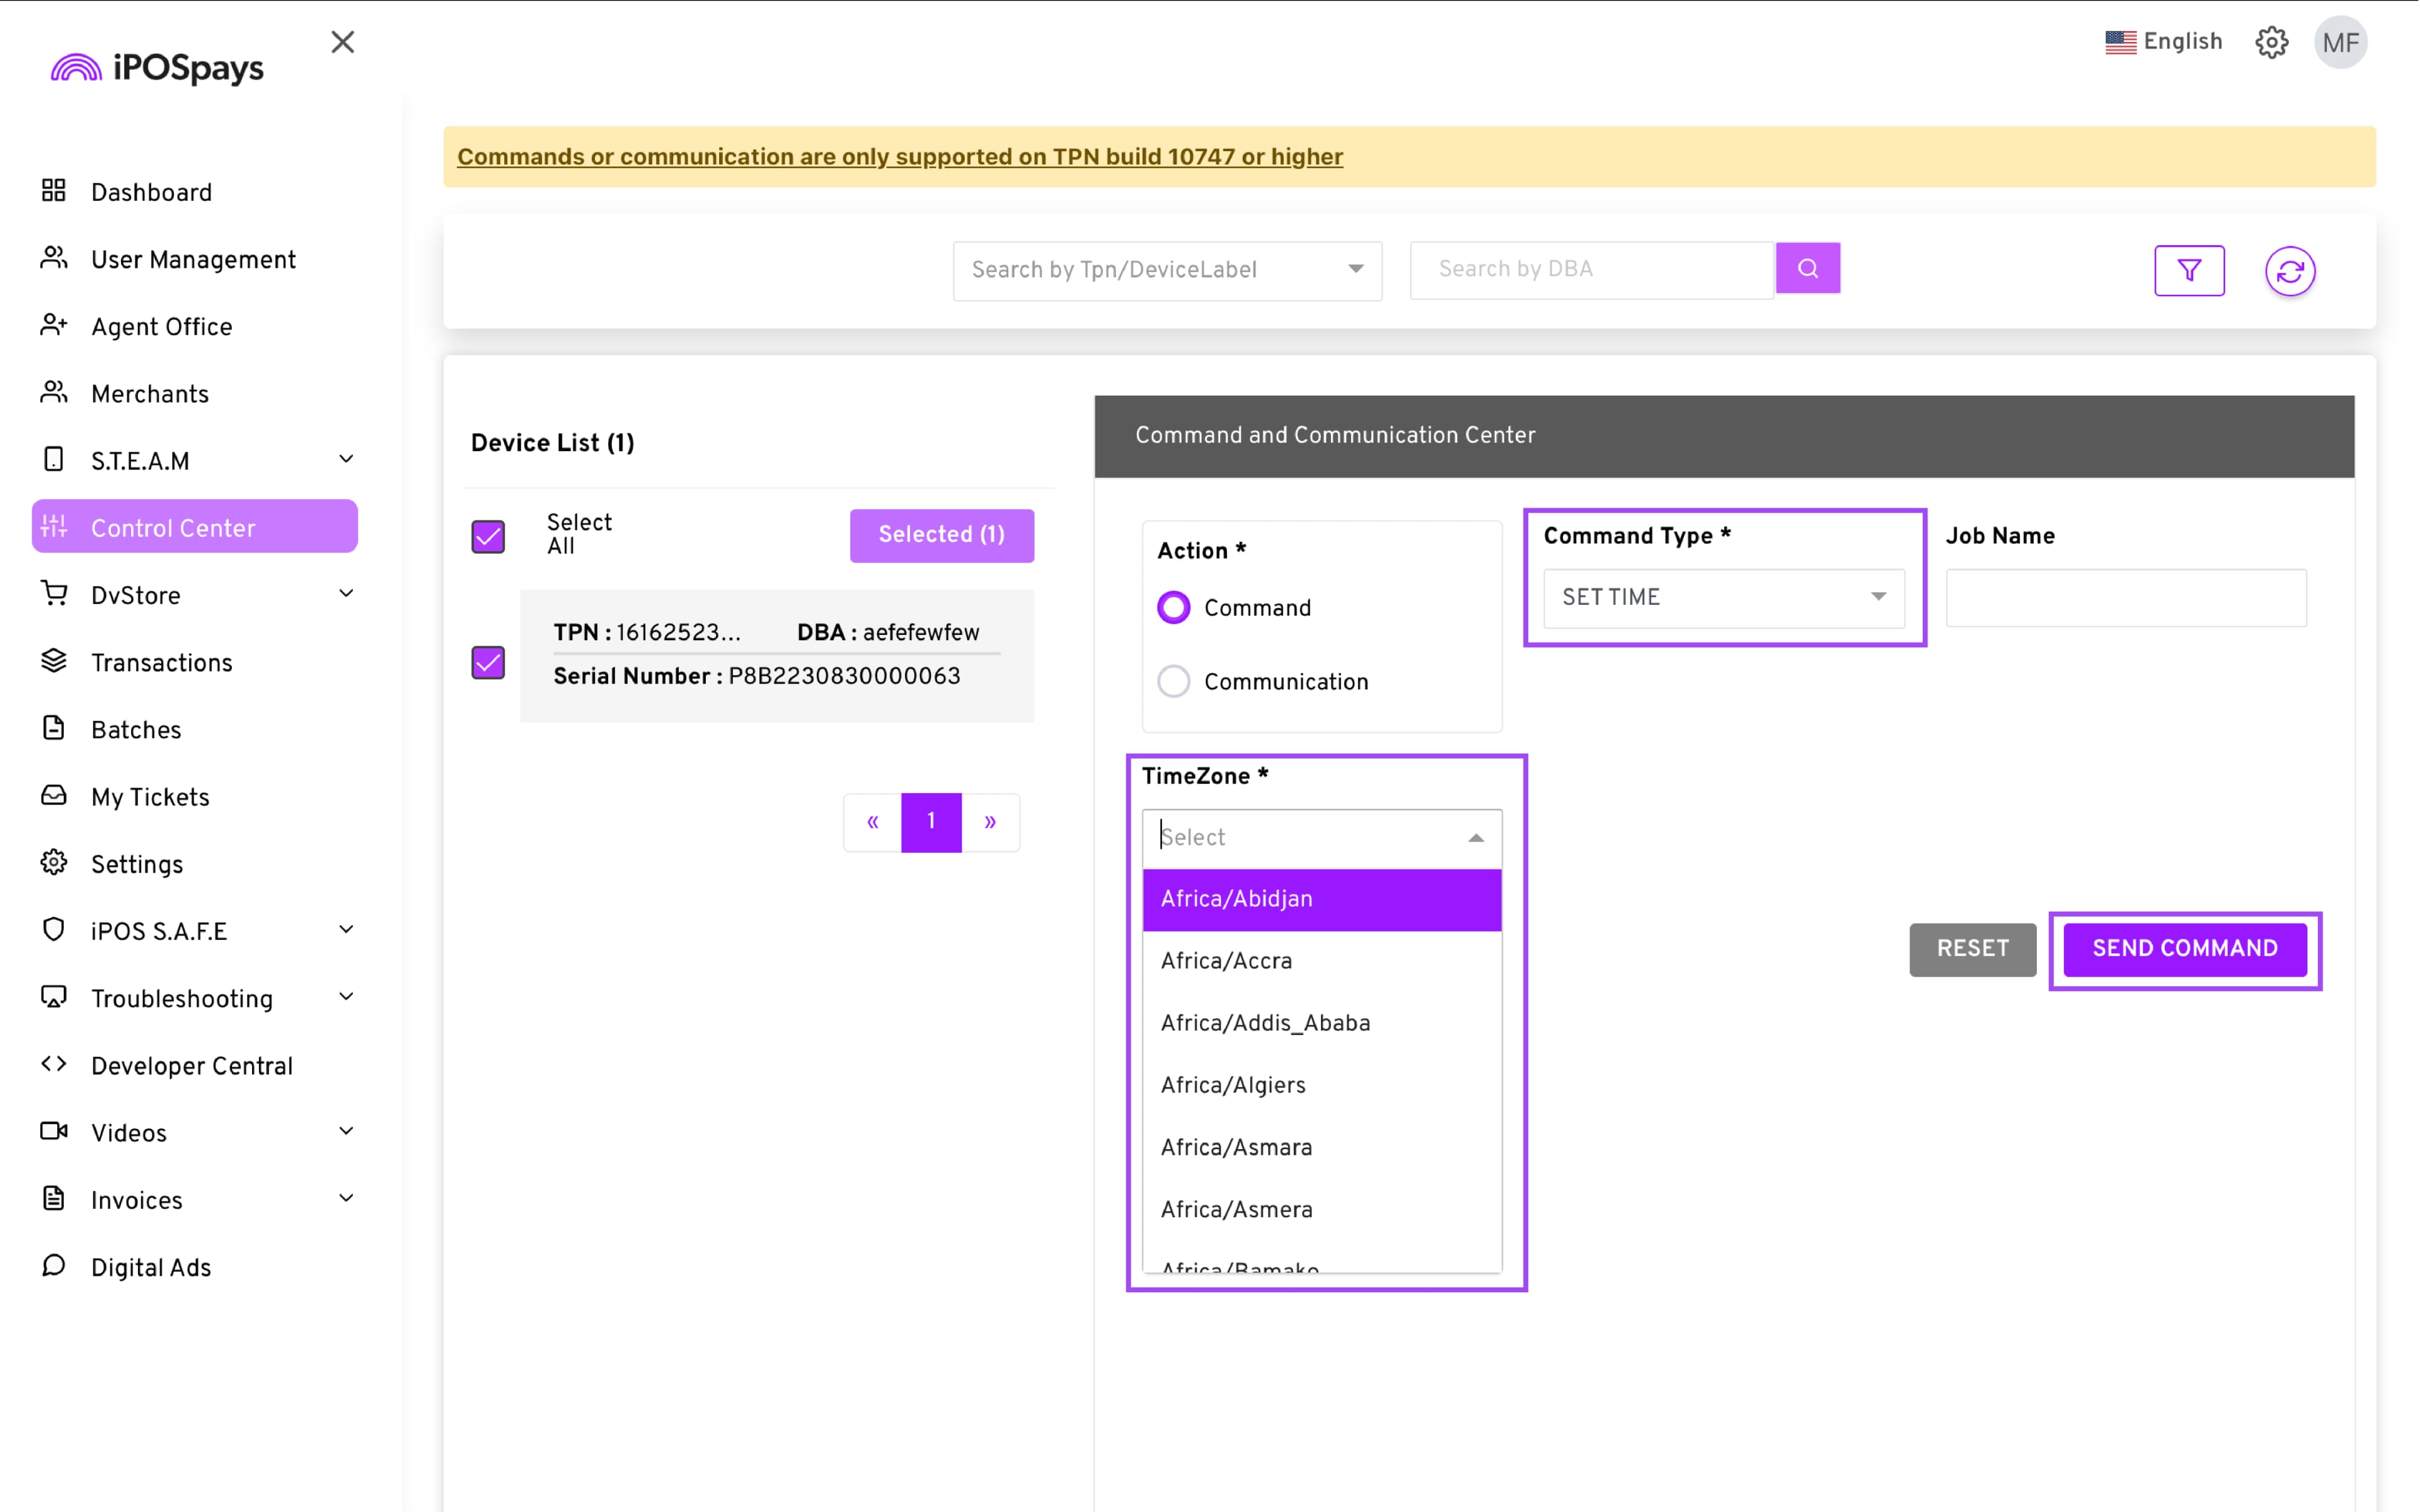
SET TIME:
Choose the SET TIME command.
Enter a Job Name (helps track the command later in the Device Alerts section).
Choose the time zone you wish to set on the terminal
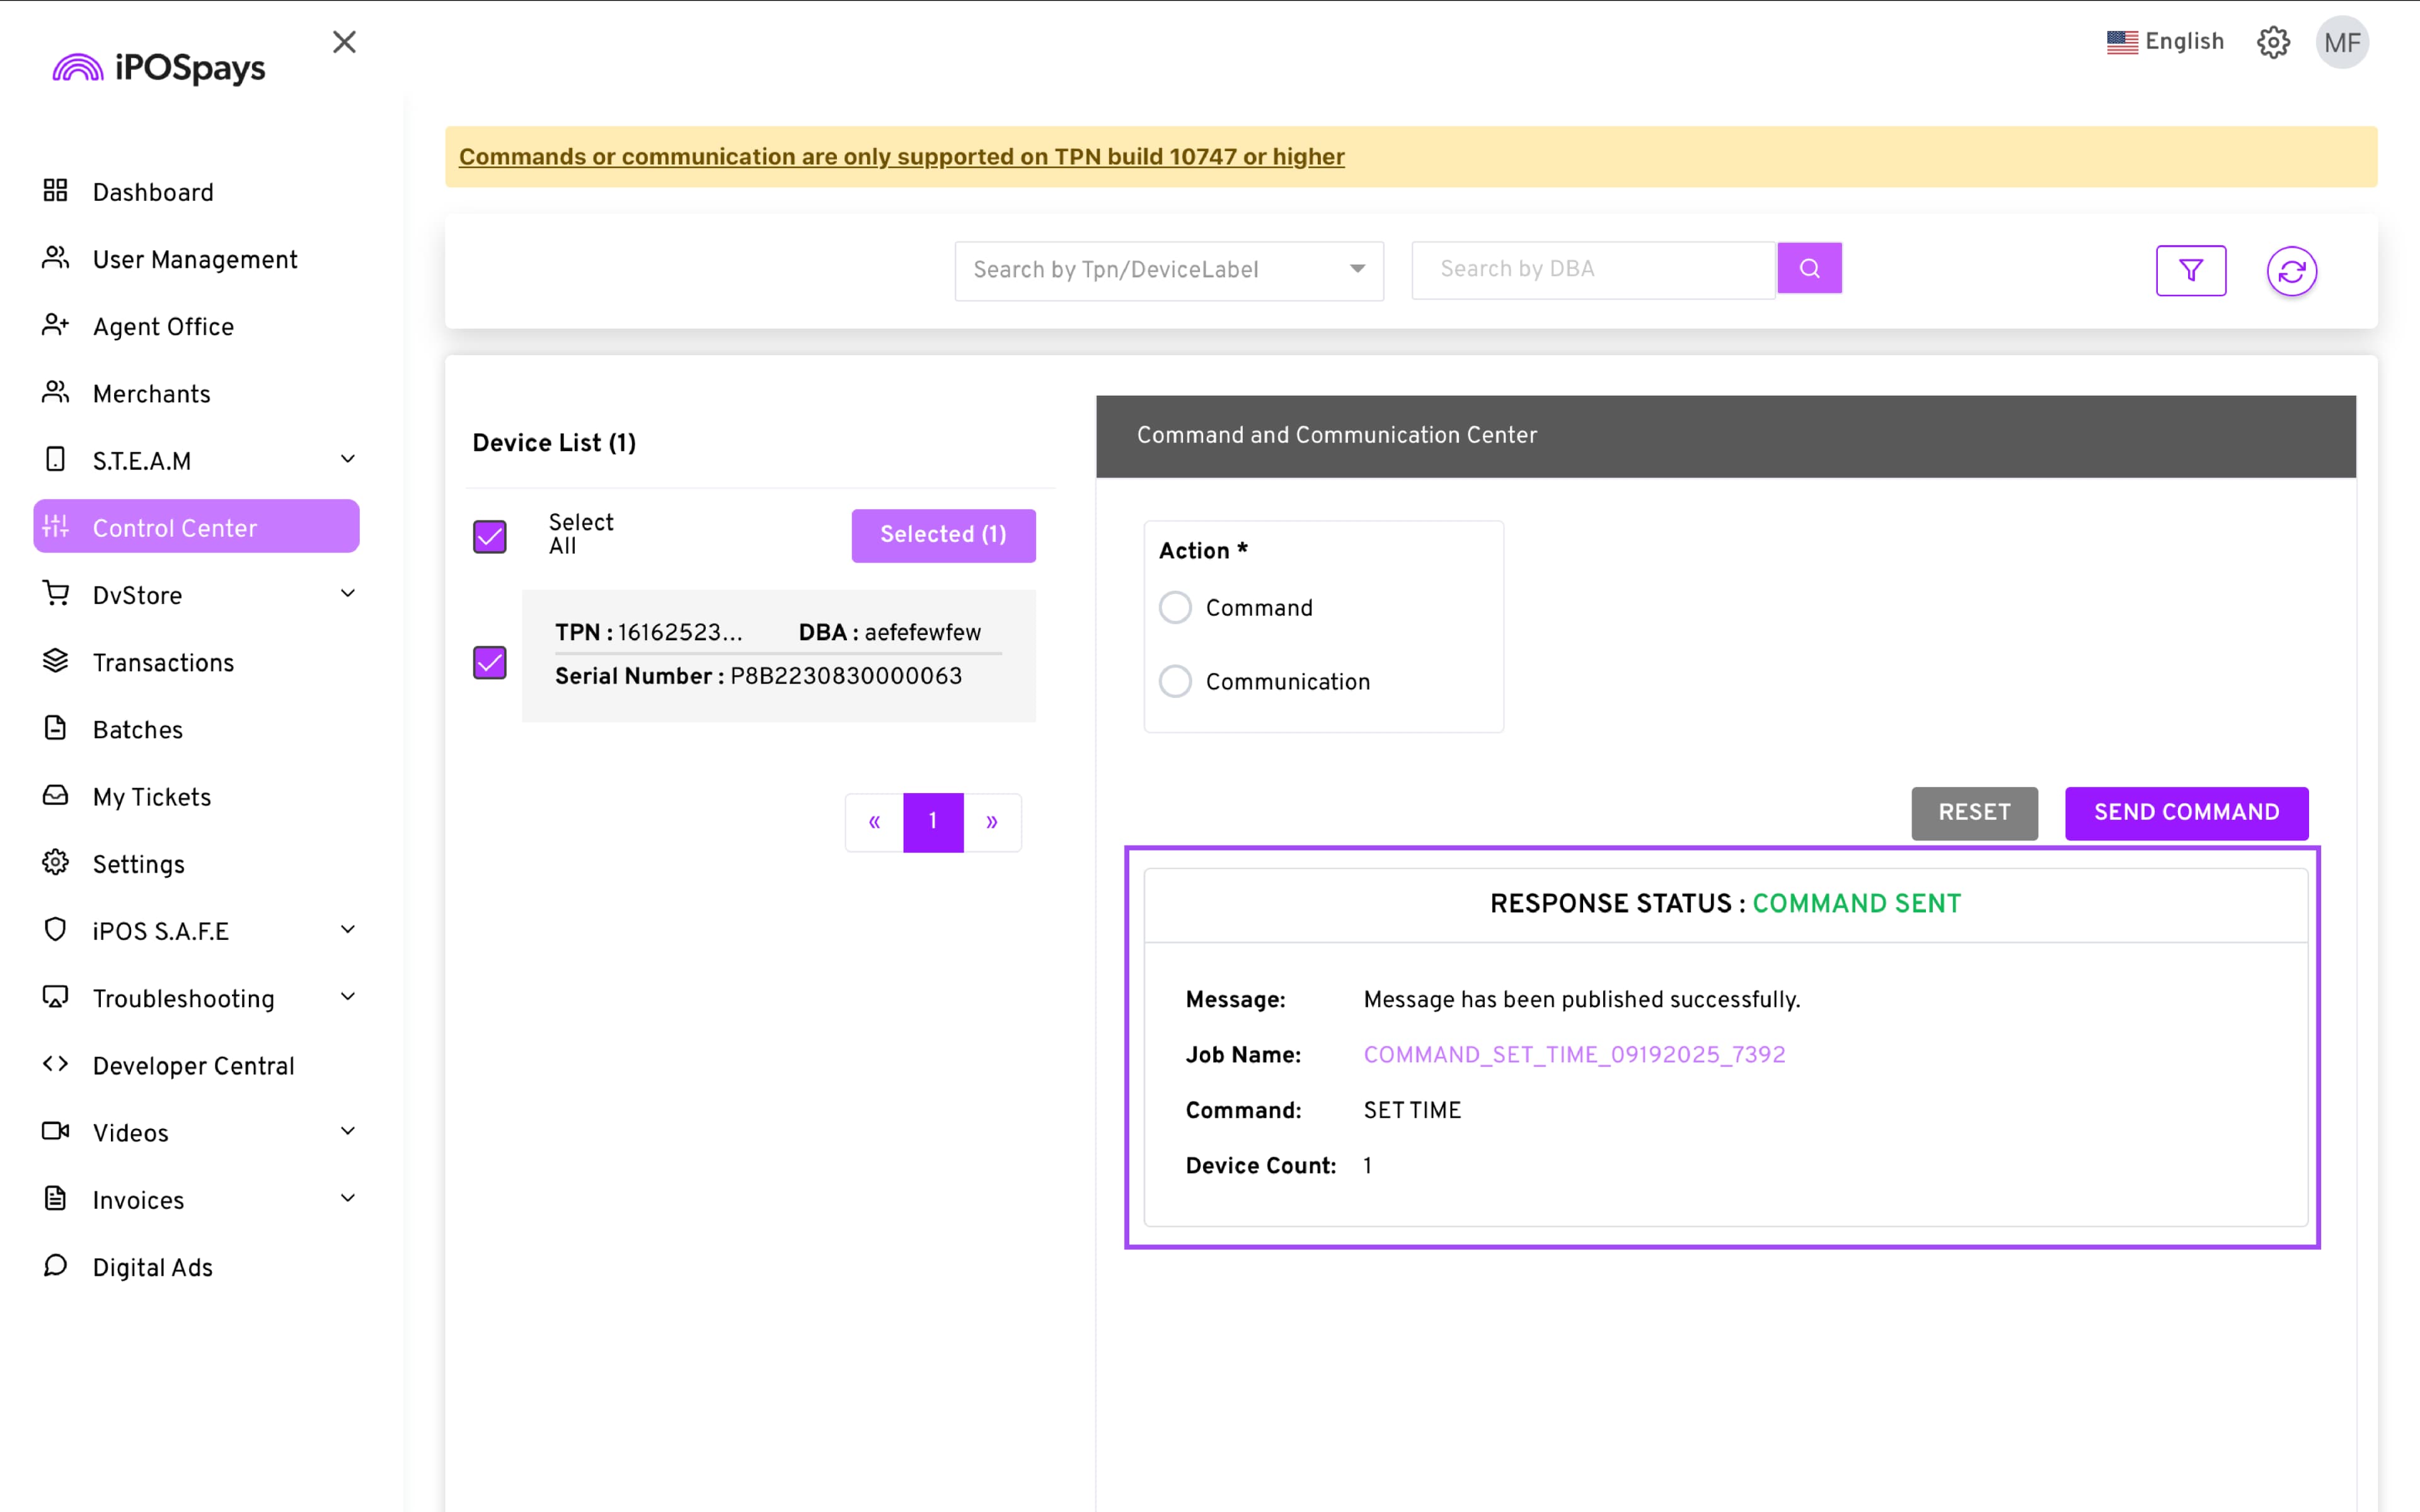
Click SEND COMMAND.
Click Confirm when the Confirm Submission prompt appears.
A banner will be displayed on the terminal before the command is executed.
If you leave the banner untouched, the terminal will automatically execute the command once the timer runs. You can also tap UPDATE to immediately execute the command or click LATER to ignore it.
The result will be displayed on the screen along with the details of the command.
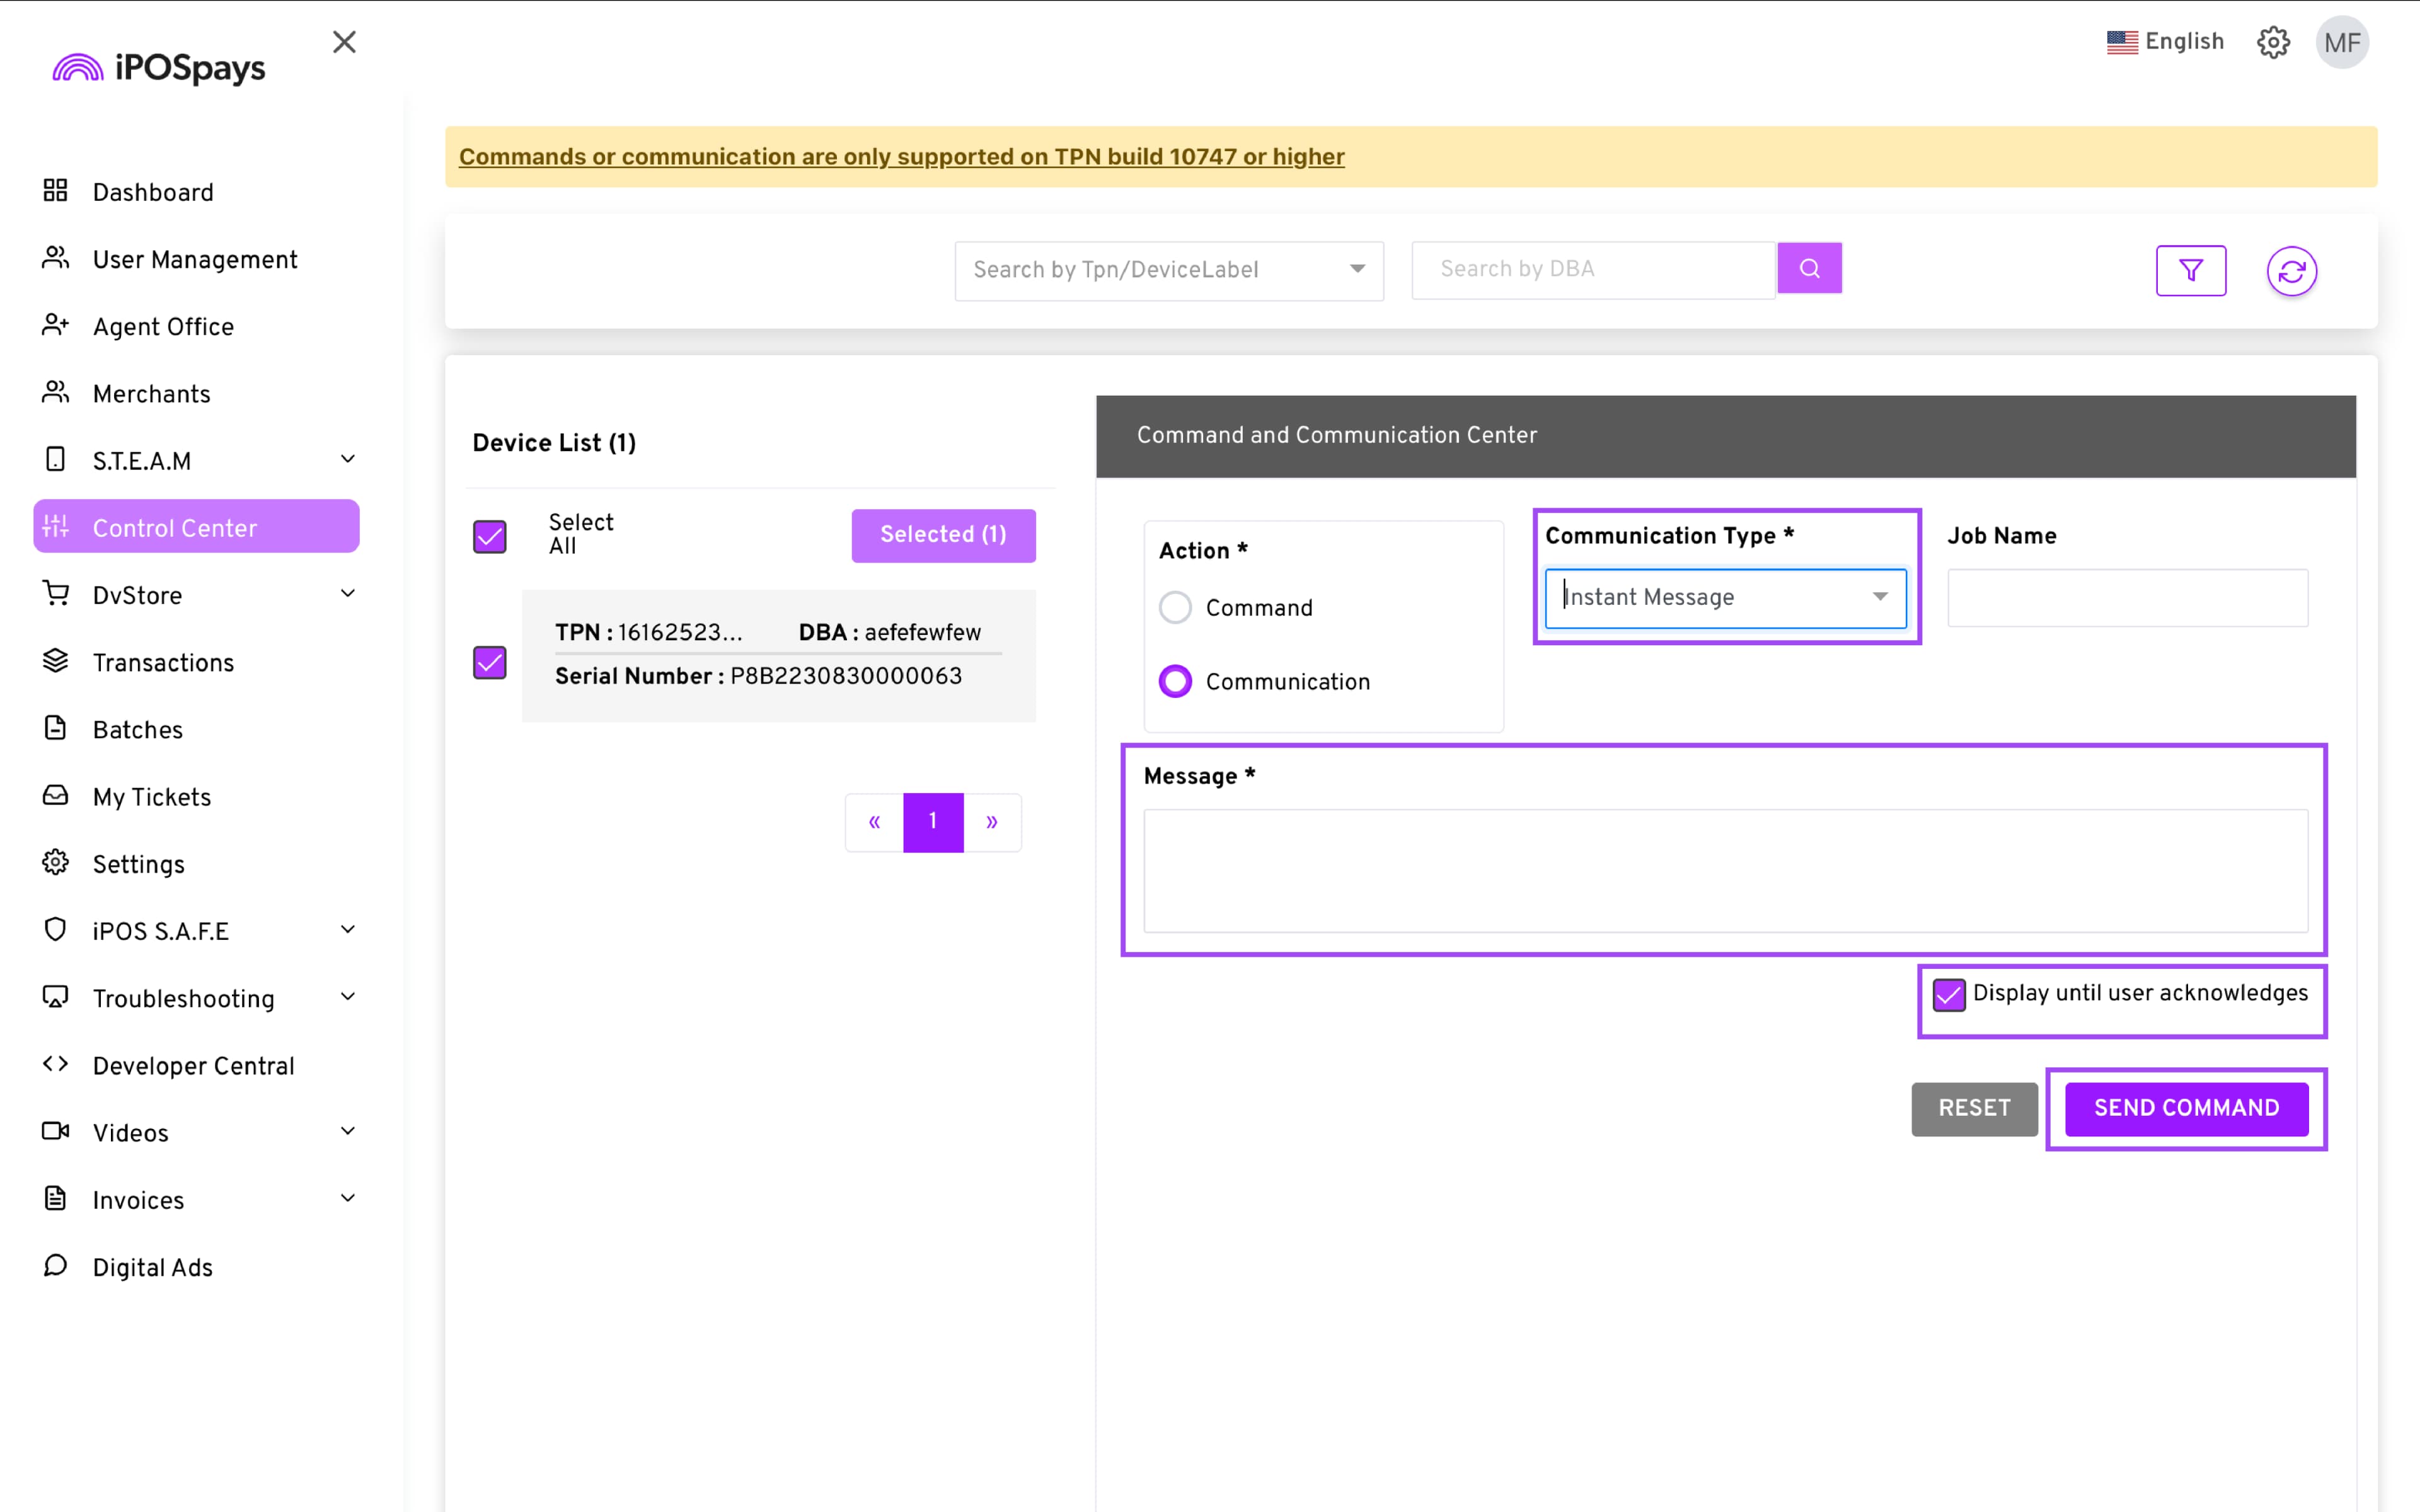
B. Communication
You can send instant messages or images to the merchant’s terminal. This can help us validate if the merchant's terminal is connected to a stable internet network. If the message gets received by the terminal, that would mean the terminal is connected to a stable internet network.
1. Instant Message
Enter the desired message in the text field.
“Display until user acknowledges” is enabled by default, so the message stays on the terminal screen until the merchant interacts with it. You can check or uncheck this option to change that behavior.
Related Articles
Setting Up Surcharge in Dejavoo
Setting Up Surcharge in Dejavoo If a merchant is utilizing surcharges, you will first want to ensure the profile is set to 'with fee'. Once selected, you can continue to add the merchant information as you normally would. If a merchant was already ...Dejavoo Offline Mode – Setup and Usage Guide
Overview Dejavoo Offline Mode allows a store to accept card transactions even when the terminal is not connected to the internet. This feature is particularly useful during temporary network outages, ensuring that business operations can continue ...How to Set Up a PDQ (Payment Terminal) on BOB CRM
This guide explains how to configure a Dejavoo PDQ terminal within BOB CRM and link it with your POS system for seamless payment processing. Follow the steps below to ensure a successful setup and integration with iPOS. Step 1: Navigate to PDQ ...Zuppler POS & Kiosk Onboarding Checklist
Please refer this checklist and execute the manual steps in BOB CRM when onboarding a restaurant with a Zuppler POS or Kiosk. Adding a Zuppler Tablet/Printer should be a one click setup, orders will flow to the tablet once the tablet is added from ...